This post covers 10 of the best relaxing restorative yoga poses for chronic illness or anyone dealing with an autoimmune disease flare-up.
The Best Yoga Poses for Chronic Illness
Exercising with a chronic illness can often be a struggle. Read now for 10 restorative yoga poses for chronic illness or anyone dealing with an autoimmune disease flare-up.
This is a guest post by Candice, a health & fitness coach at littlestepsbighappy.com.
Are you new here? Here's tips to live gluten-free without the stress!
- How to eat out SAFELY when you’re gluten-free
- How to make ANY recipe gluten-free
- How to TRAVEL gluten-free and still have fun
…get valuable support in my EXCLUSIVE Facebook community “Stress-Free Gluten-Free” by clicking here!
The gluten-free guide below is based on personal experience and research. Always be sure to discuss any medical changes with your doctor for your personal medical needs. Additionally, this post contains affiliate links. As an Amazon Associate I earn from qualifying purchases. My full disclosure isn’t that interesting, but you can find it here.
Unveil the keys to gluten-free success!
Get customized recipes, tips, and resources that match your unique vibe.

For some, managing their illness means dealing with things like pain, swelling, fatigue, trouble sleeping, and more. Your body may have certain limitations when it comes to how much or how often you can workout.
This can make it difficult to perform most forms of exercise, including lighter ones like traditional yoga. Restorative yoga, however, is a great form of exercise to do if you have a chronic illness.
Restorative yoga is a calmer and gentler form of exercise that can help relieve some of the symptoms of chronic illnesses and autoimmune disease flare-ups without overtaxing your body.
What is restorative yoga?
Restorative yoga is a sequence built up of 6-7 yoga poses. Each pose is usually supported by props and you hold them for an extended period of time. Anywhere from 2-10 minutes.
The extended length of time that you hold these poses allows you to breathe deeply and really let your body stretch and relax. You allow all the strain and stress in your body to flow out as you settle deeply into the poses.
These yoga poses are a great option for anyone managing chronic illness because you get a lot of the benefits of traditional yoga, but there is no stress or strain in the positions.
According to Catherine Guthrie from yoga journal, “On a physical level, studies show that yoga stimulates the parasympathetic nervous system (the calming influence), which reduces the body's stress response. This can have a profound effect on the immune system.”
This can be especially effective for anyone dealing with an autoimmune disease flare-up as well.

Benefits of restorative yoga poses for chronic illness
Restorative yoga also has other great benefits that can help someone managing a chronic illness.
Here are some of the top benefits:
- Reduce the production of stress hormones
- Improve the function of your immune system
- Reduce muscle tension
- Help with insomnia
- Improved flexibility
- Help with symptoms of depression
Restorative yoga is a useful addition to anyone’s exercise program, but it can be a key part of managing and thriving with chronic illness, especially when exercise should be low impact and focused on care.
Tips for practicing restorative yoga poses for chronic illness
1. Listen to your body
As with any type of exercise you do, make sure you are listening to your body. Yoga should never feel painful. Make sure that you are staying within a comfortable range of motion.
With restorative yoga, the goal is to get your body into a comfortable stretch so that you can fully relax. That may mean that you have to use several different props, blankets, pillows, etc.
It may also mean that you hold some positions for longer than others. You might also need to cut your practice short depending on how you are feeling.
All of that is ok!
What’s important is that you took the time to intentionally care for your body and you’re listening to its needs and limitations.
2. Use plenty of props
As I mentioned before, you want to let your body fully relax and settle when you are practicing restorative yoga poses for chronic illness. This means that you will need to fully support your body in each pose.
Here are some good props to have on hand:
Are you new to yoga? You can order a starter pack on Amazon with the most essential yoga items so you can get started quick! Click here to take a look.

If you don’t have any yoga props on hand, you can use some blankets, towels, and pillows as well. You will see in the photos, I used some couch cushions, pillows, and blankets and they worked fine.
Make sure you have all of the props that you will need on hand before you get started with your practice.
3. Create a comfortable environment
Make sure that you are in a comfortable environment before you start practicing these yoga poses for chronic illness. You want to be in a warm, quiet, and calm space.
This will help to further relax you and allow you to more easily settle into the poses.
You also want to be sure you are wearing appropriate clothing. You want to wear loose comfortable clothes that you can stretch and relax in.
It may also be helpful to wear layers and socks because your body may cool down as you settle into poses for long periods of time.
4. Take your time
When practicing restorative yoga, especially if you are dealing with chronic illness, you want to take your time and keep it slow. Settle into each pose for anywhere from 2-10 minutes. Even longer if you choose.
The goal is not to move through the poses as quickly as possible. It’s to fully settle into each position so that your body can stretch and relax.
That may mean that you only cycle through 2 or 3 poses during your practice. That’s ok! Each practice is going to be unique to you and how you’re feeling that day.
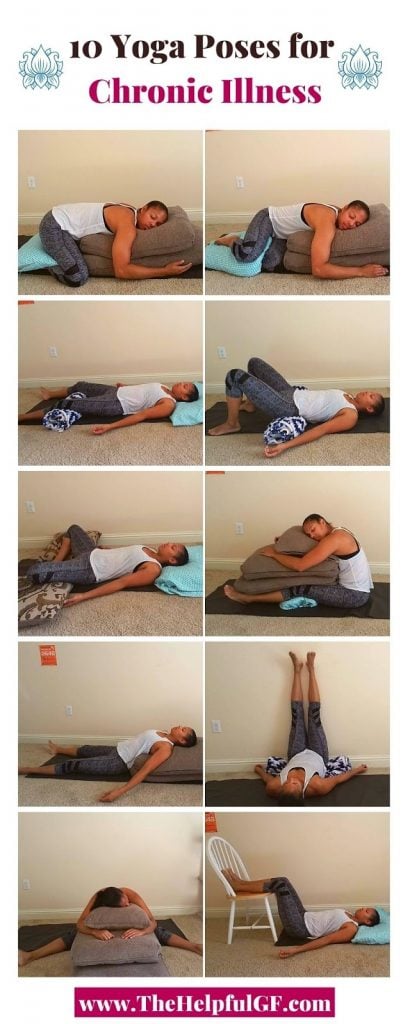
10 Restorative yoga poses for chronic illness
Pose 1: Supported Child’s Pose
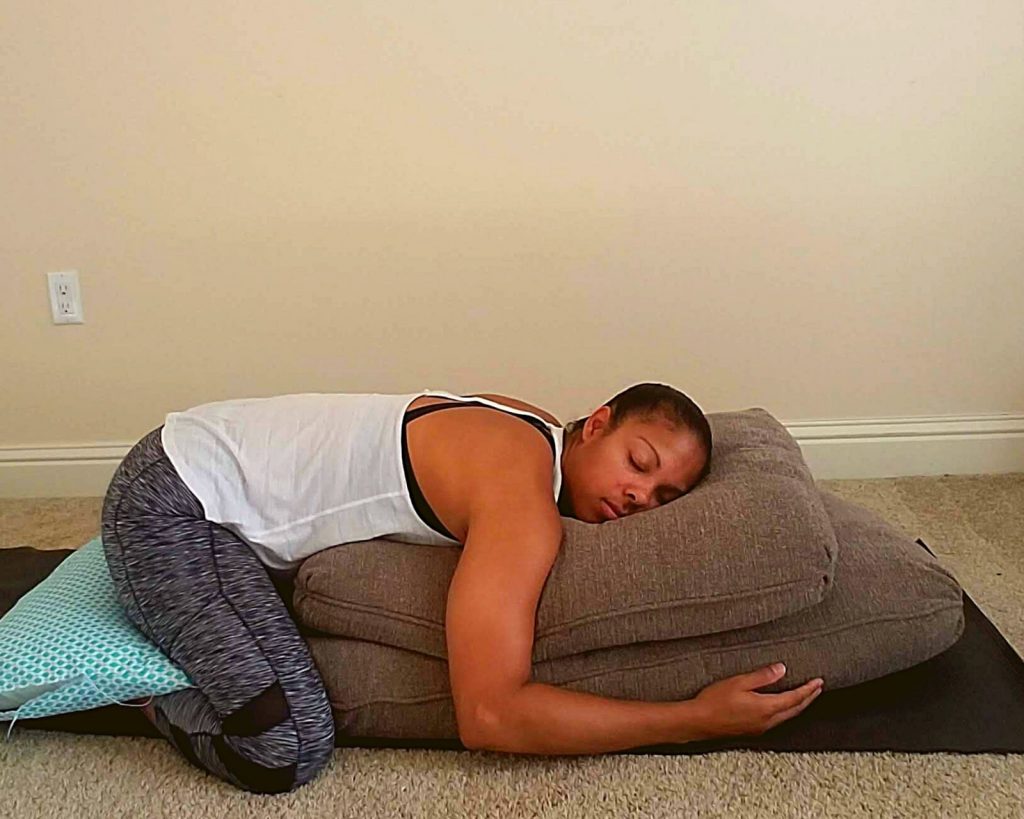
Place your bolster or some folded blankets vertically on your yoga mat. In a kneeling position, place a thinly folded blanket in front of your ankles and another thinly rolled blanket behind your knees.
Spread your knees apart wider than your hips. Lay your belly, chest, and head on the bolster/folded blankets in front of you. Let your arms drape on either side of you and relax.
Pose 2: Supported Twist
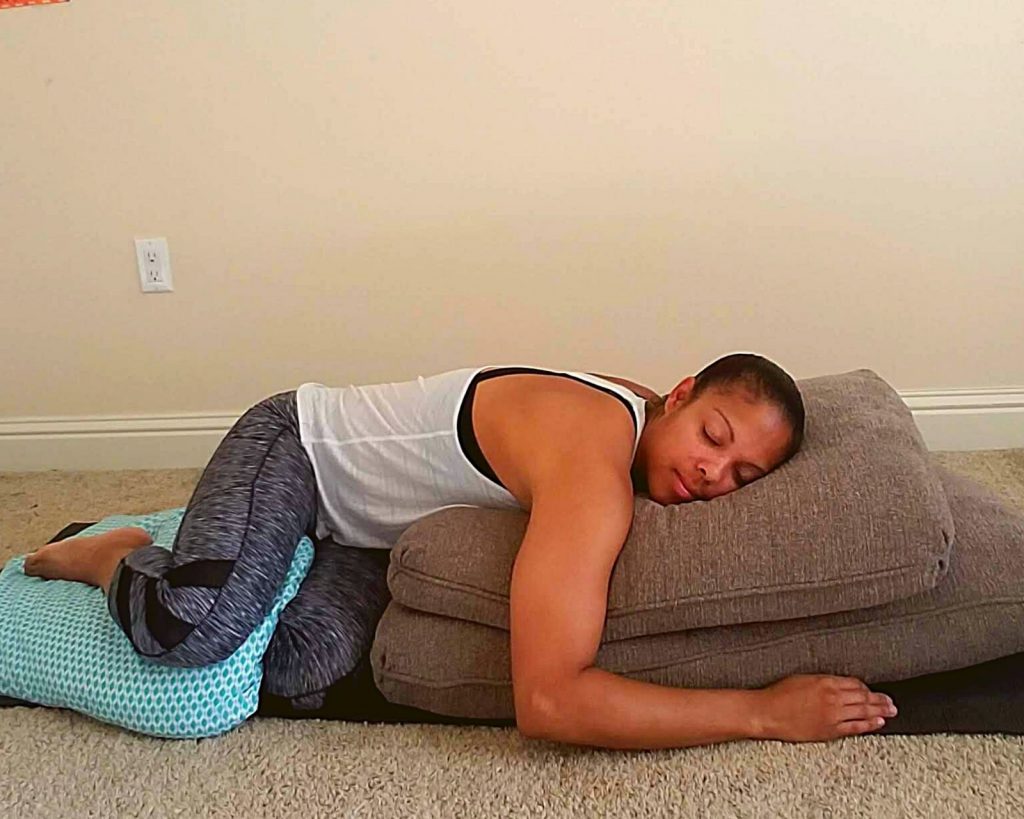
Sit on your right hip with your knees stacked together. Place your bolster or folded blankets vertical to your yoga mat.
Pull your bolster/folded blankets snug to your right hip. Turn your upper body to face your bolster/folded blankets and lay your belly, chest, and head on the blankets.
Allow your arms to relax to the ground and settle into the pose. Add any additional blankets or pillows to support your body as needed.
Pose 3: Basic Relaxation Pose
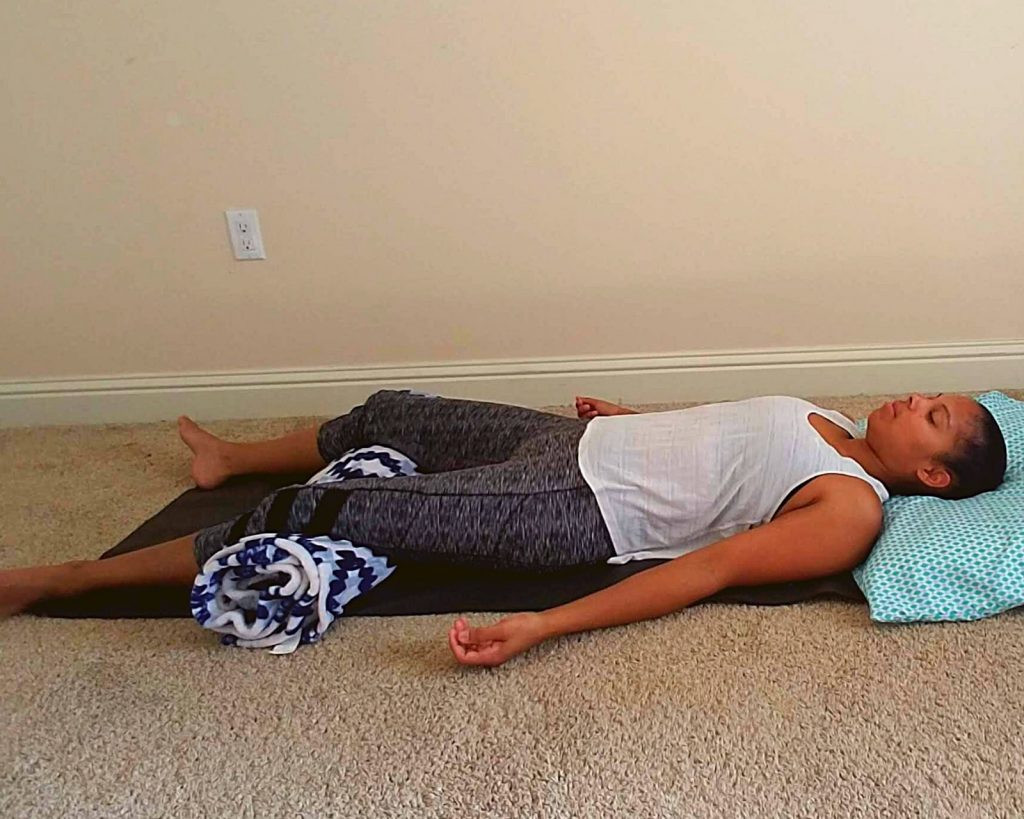
Lie flat on your back. Place a thinly rolled blanket or pillow under the head. Place a bolster or a folded blanket under the knees. Allow the feet and hands to fall open into a relaxed position.
Pose 4: Supported Bridge Pose
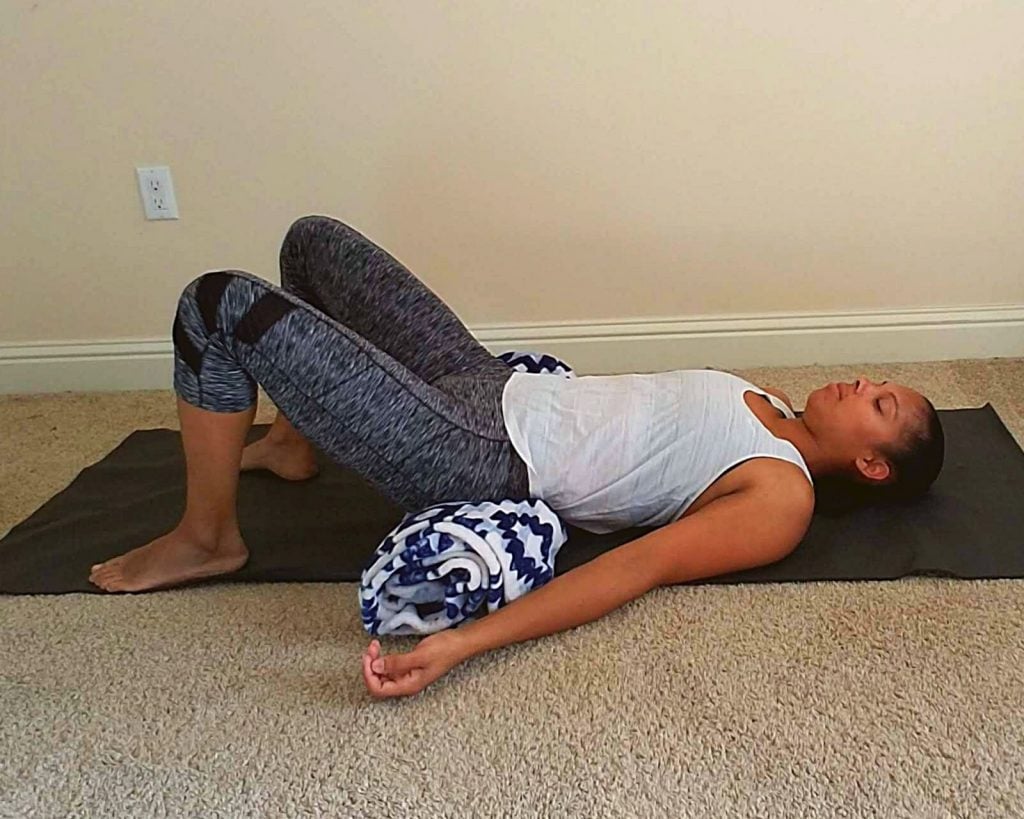
Lie on your back with your bolster or folded blankets near your hips. Bend your knees and place your feet flat on the ground hip-distance apart.
Pushing through your heels, lift your hips and slide the bolster/folded blankets under your lower back and lower your hips down.
Adjust the bolster/folded blankets until you feel comfortable and supported. If the bolster/folded blanket is too high, try a rolled-up towel, small pillow, or thinly folded blanket instead.
Rest your arms out to the side in a comfortable position and relax into the pose.
Pose 5: Reclining Bound Angle Pose
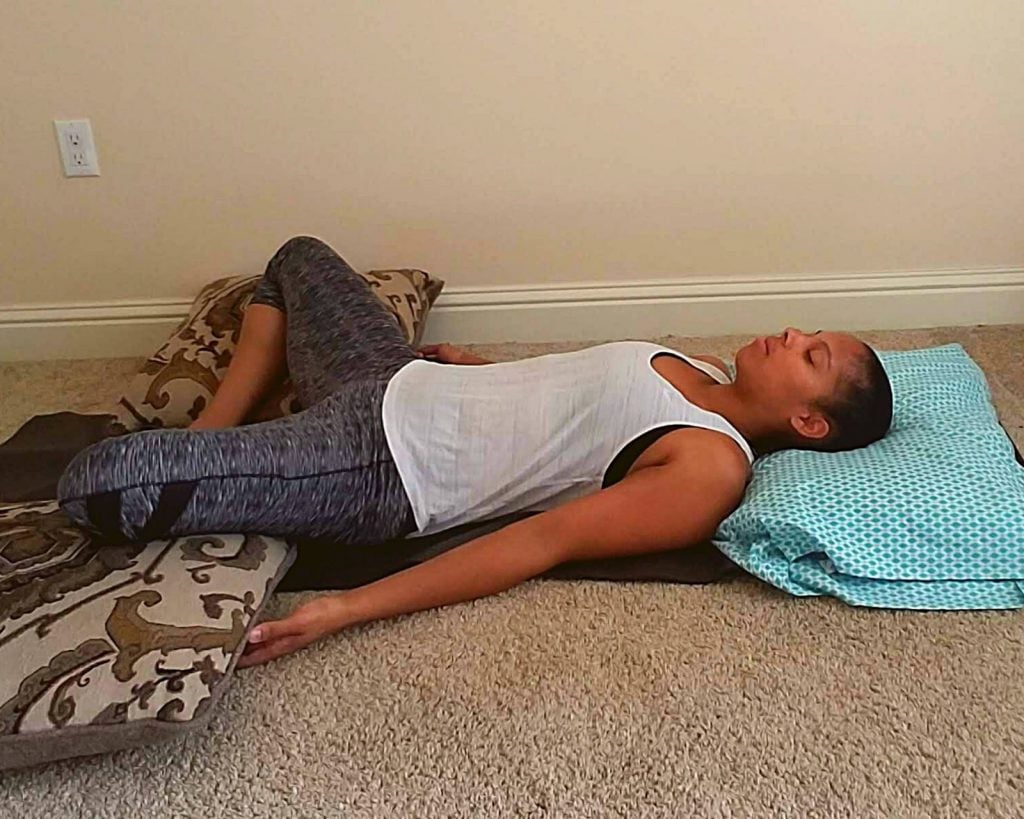
Sit on the floor with the soles of your feet touching. Make sure your knees are bent and pull your feet into your body as close as you can without discomfort.
Place a folded blanket or pillow under each knee so they will be comfortably supported when you recline. You can also place some folded blankets under your back to support your torso and shoulders.
Gently lower your upper body until you are lying on your back. You can also place a pillow or thinly folded blanket under your head.
Lay your arms out to the side, palms facing up. Relax and settle into the pose with deep breaths.
Pose 6: Supported Forward Fold
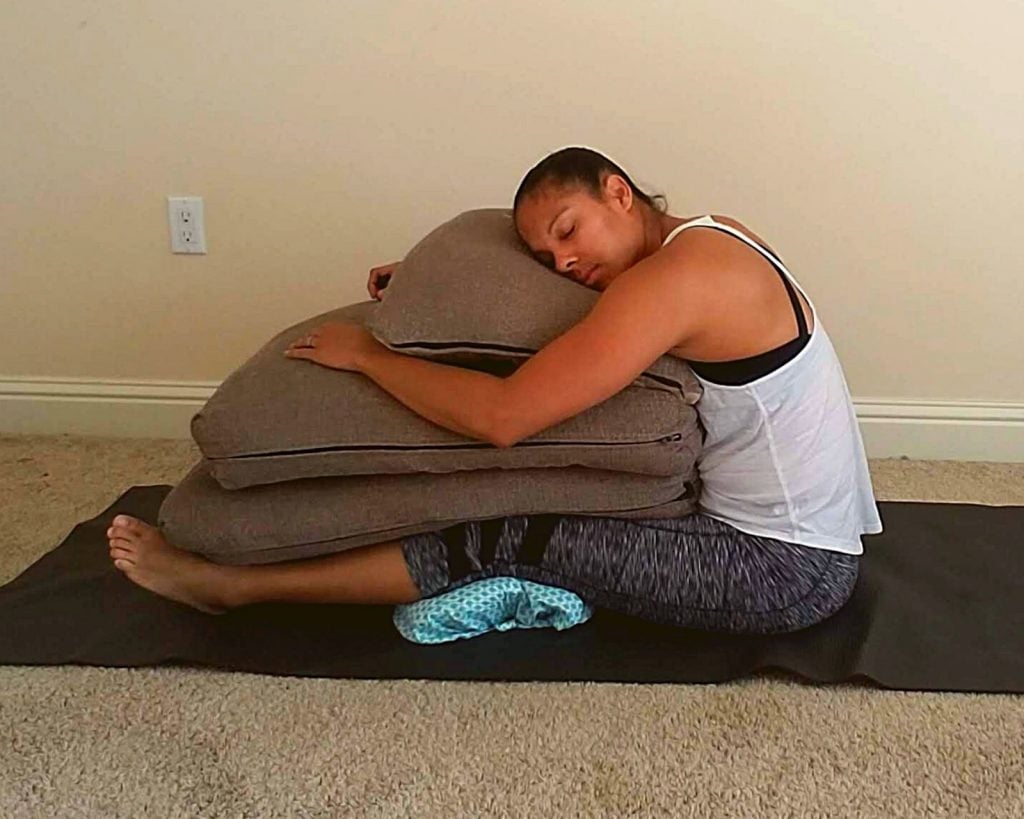
Sit on the ground with your legs stretched out straight in front of you. Place a thinly rolled/folded blanket under your knees.
Place a bolster and folded blankets on top of your thighs close to your belly. Fold your upper body forward until it rests on the bolster/folded blankets.
If you feel any strain or discomfort, add more blankets or pillows until your bolster is high enough to support your head and upper body.
Place your hands on the bolster in front of your head and relax into the pose.
Pose 7: Supported Fish Fold
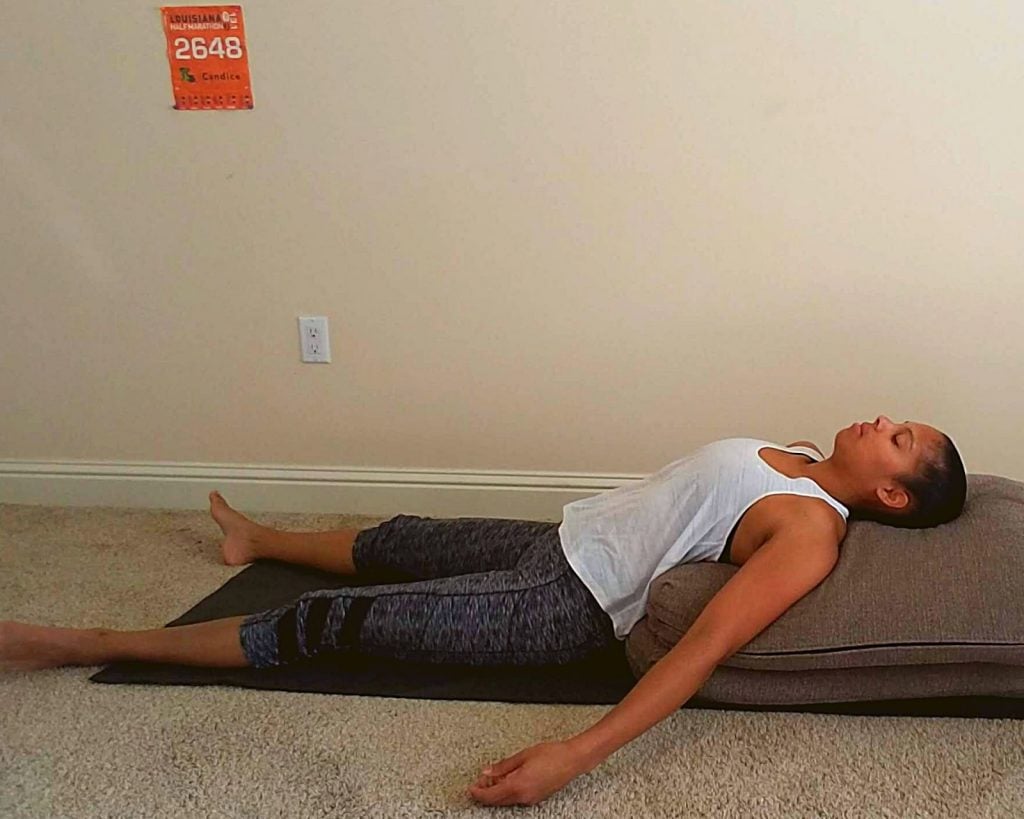
Place your bolster or folded blankets vertically on the mat. Sit in front of it facing away with your knees bent and feet on the ground.
Gently lower your upper body onto the bolster/folded blankets and make sure your torso and head are fully supported. Let your arms relax out to the sides.
You can keep your legs bent or let them straighten out and relax open. Settle into the pose with some deep breaths.
Pose 8: Legs Up the Wall
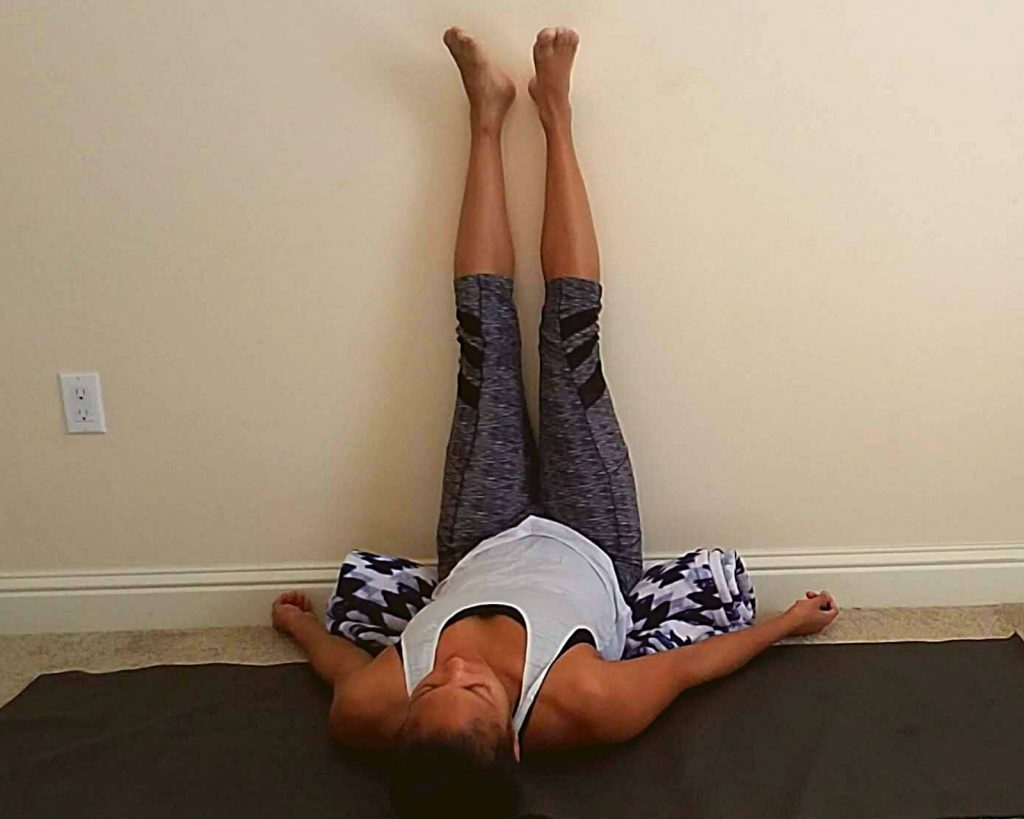
Place your yoga mat vertically against the wall. Place your bolster or folded blankets nearby. Lie on your back and place your legs up against the wall.
Place your feet against the wall and slide your bolster/folded blankets under your hips. Straighten your legs straight up the wall and relax your arms out to the side.
Relax into the position with deep, calming breaths.
Pose 9: Supported Wide Leg Fold
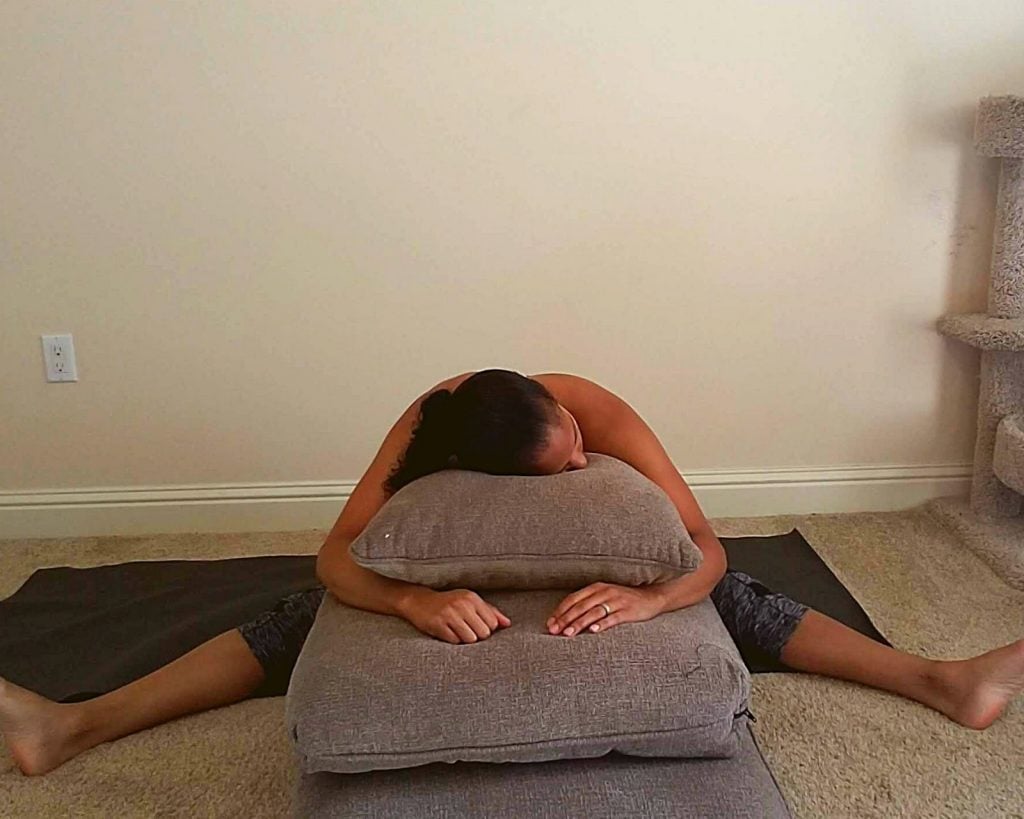
Sit on your mat with your legs straight out in front of you. Open your legs into a comfortable straddle with your toes and feet pointing toward the sky.
Place your bolster or folded blankets directly in front of you between your legs. Walk your hands out forward until your belly, chest, and head rest on the bolster/folded blankets.
If the position feels strained or uncomfortable, add more blankets or pillows until your upper body is comfortably supported. Rest your hands under your forehead or in front of your head on the bolster/folded blankets.
Relax into the pose with deep, calming breaths.
Pose 10: Legs Over Chair
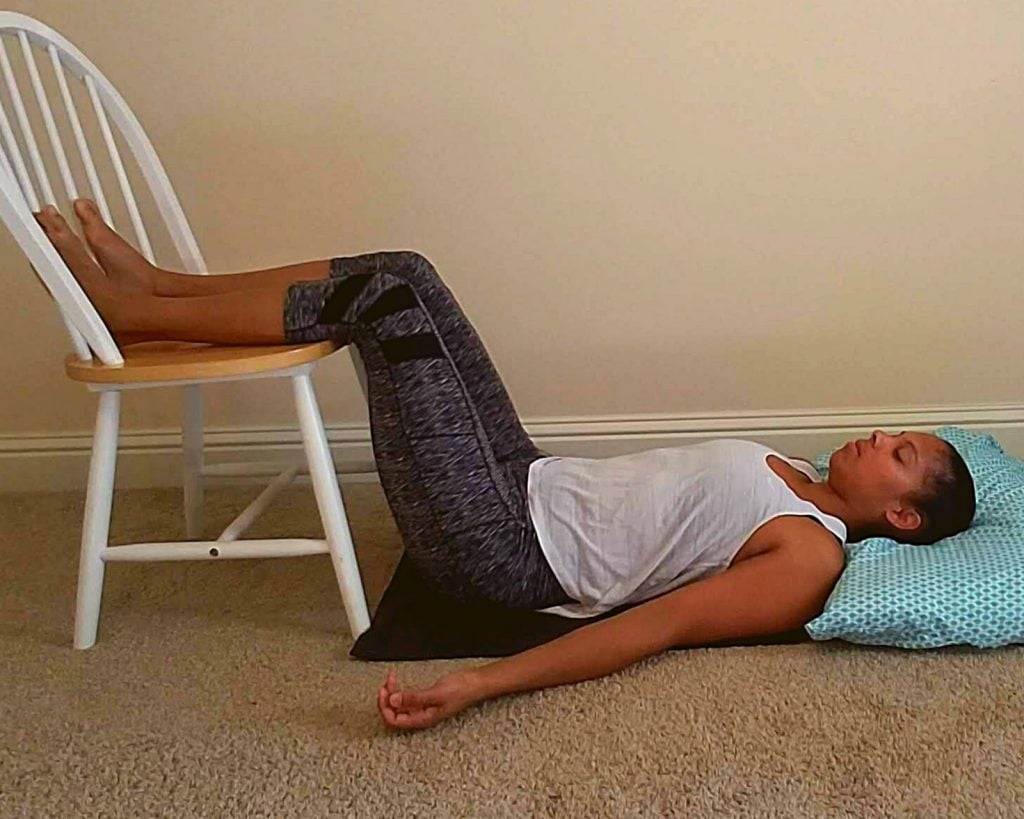
Place a chair at the end of your yoga mat. Lie down on your mat, bend your knees, and place your calves on the chair.
You want your knees to be bent at a 90-degree angle. If your chair is too high, place a folded blanket under your hips. If your chair is too low, place a folded blanket on the chair under your legs.
Place a pillow under your head and let your arms rest out to the sides, palms facing up. Relax into the pose with deep, calming breaths.
So there you have 10 of the best yoga poses for chronic illness. You can use these exercises to help your body rest and relax even on the bad days when you are dealing with pain, fatigue, or an autoimmune disease flare-up.
Have you tried restorative yoga yet? If so, comment below and share your favorite pose or let me know what you think.
Did you love this restorative yoga sequence?
If so, be sure to pin it to Pinterest or share it on social media using the social sharing buttons below!
Other posts on living with autoimmune disease you may find interesting:
About Candice:

Candice is a Health and Fitness Coach for moms and she blogs over at https://littlestepsbighappy.com. She is a busy homeschooling momma of 3 who believes that every mom deserves to feel fit and healthy, inside and out.
She can often be found chasing her kids around, reading romance novels, or training Brazilian Jiu-Jitsu. If you would like to connect with her you can find her on Facebook, Pinterest, or Instagram.


Leave a Reply