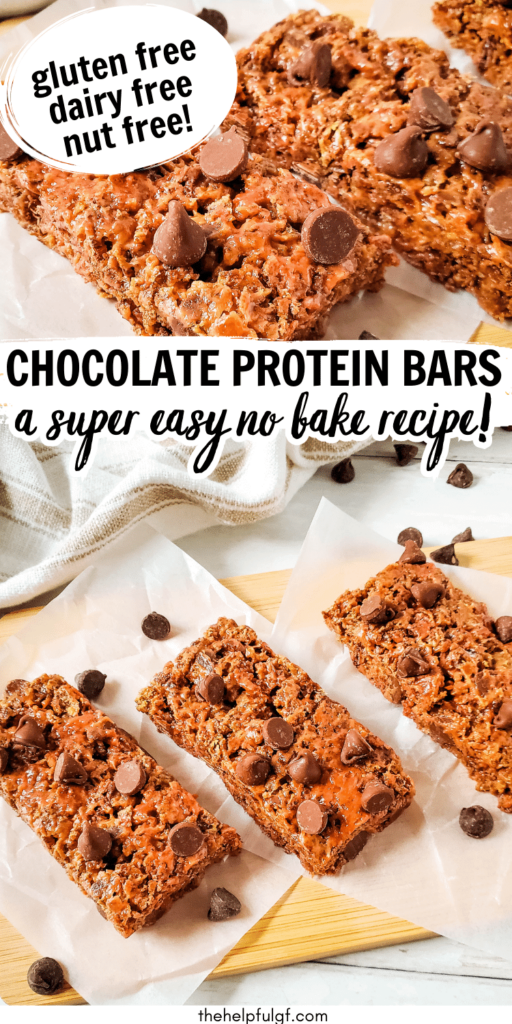
Ready to fuel your body with an on-the-go breakfast or snack that's not only delicious but nut-free, gluten-free, and dairy-free? Then, you are in luck! This homemade double chocolate nut-free protein bar recipe made with rice cereal is the perfect go-to snack for people who don't want to compromise taste for diet restrictions.
Not only is this recipe nutritious, easy to make, and budget-friendly but it's one that can be enjoyed by everyone in the family!
In this article, we'll give you a step-by-step guide on how to make these delicious protein bars, as well as the nutritional breakdown of what you'll be eating.
So, read on to learn how to make this protein-packed treat that will satisfy your sweet-tooth without straining your wallet!
Are you new here? Here's tips to live gluten-free without the stress!
- How to eat out SAFELY when you’re gluten-free
- How to make ANY recipe gluten-free
- How to TRAVEL gluten-free and still have fun
…get valuable support in my EXCLUSIVE Facebook community “Stress-Free Gluten-Free” by clicking here!
The gluten-free guide below is based on personal experience and research. Always be sure to discuss any medical changes with your doctor for your personal medical needs. Additionally, this post contains affiliate links. As an Amazon Associate I earn from qualifying purchases. My full disclosure isn’t that interesting, but you can find it here.
Take this quick quiz and uncover the secrets to making your gluten-free lifestyle not just manageable, but truly enjoyable with custom recipes and tips!

Why You'll love this Delicious Double Chocolate No-Bake Nut-Free Protein Bar Recipe
Making your own protein bars that are gluten-free, nut-free, and dairy-free doesn’t have to be difficult. You'll absolutely love that:
- This easy recipe for protein bars without nuts is the perfect way to get a protein boost without any of the common allergens.
- These no-bake bars are made with cereal for a boost of iron and folate due to fortification.
- These peanut free granola bars are also made without oats which is perfect for individuals with celiac disease who also have oats intolerance.
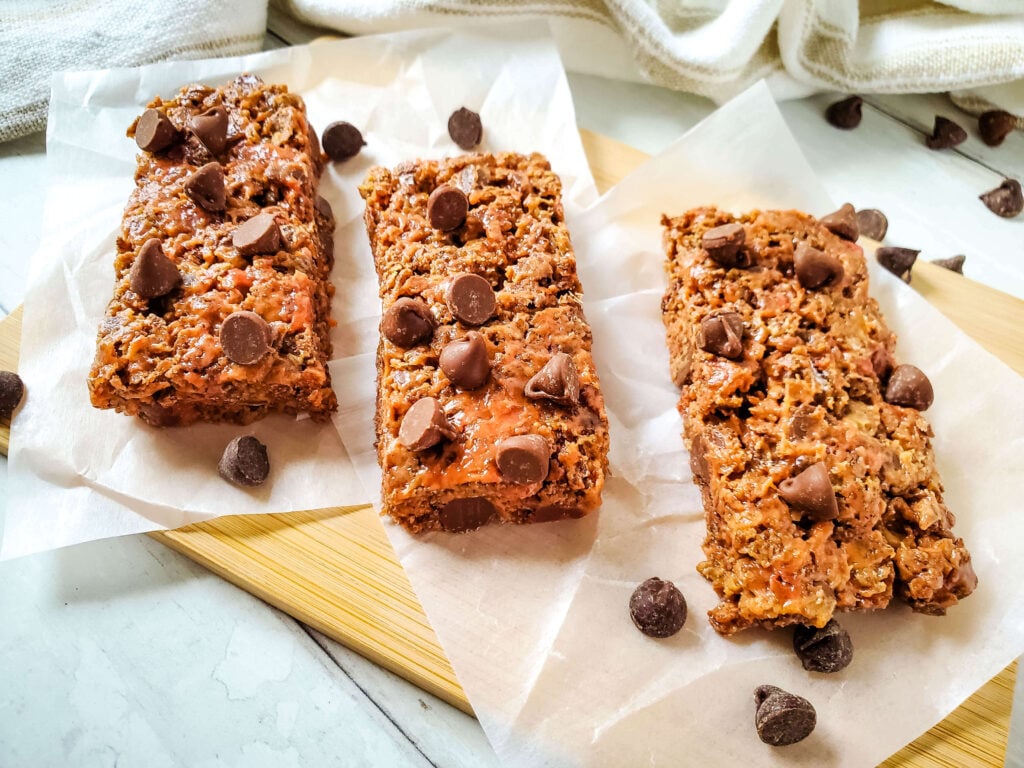
This is sure to become one of your favorite high protein dairy free snacks.
Is it cheaper to make your own protein bars?
Yes, it can be cheaper to make your own protein bars at home. On average, nut-free protein bars that are also gluten free and dairy free range from $2.08-$3.50 per bar.
By contrast, this recipe will range from $1.25-$1.80 depending on ingredients used.
Looking for premade protein bars? Check out my review of 10 popular gluten free protein bars here.
What is a good binder for protein bars?
When making protein bars, it is important to use a good binder. A binder helps hold all the ingredients together and gives the protein bar shape. Without a binder, the bar would be crumbly and break apart easily.
In this recipe, we use sun butter and honey. If you're looking to make these bars vegan there are some substitutions listed below in the ingredients list.
Equipment for Gluten Free Nut Free Cereal Bars
To make these easy gluten free cereal bars without oats, you’ll need just a few pieces of equipment:
- Measuring cups and spoons.
- Medium mixing bowl.
- Spatula.
- Parchment paper.
- An 8x8in pan
Ingredients to Make Homemade Protein Bars without Peanut Butter
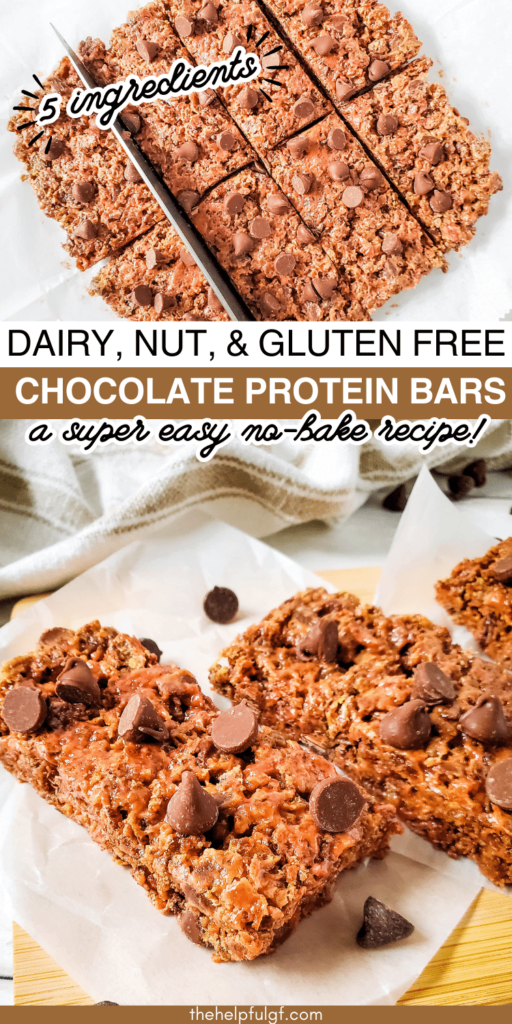
It only takes 5 ingredients to make these super simple homemade bars–some of which you may already have on hand!
You should be able to find most of these ingredients at your local grocery store (you can use the instacart button in the recipe card to add them to your grocery delivery easily), but you can also find great deals on allergen free ingredients online through Thrive Market.
Learn more about why I love Thrive Market here, or you can snag a promotional link to receive up to 25% off your first order plus a free gift by clicking here!
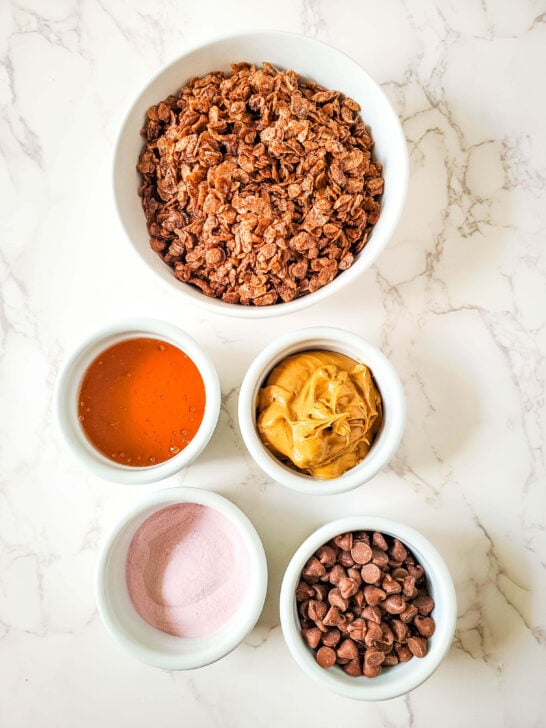
To make this double chocolate nut-free protein bar recipe you’ll need:
- Cocoa Rice Cereal. There are a few great brands! I used Cocoa Pebbles, but if you want an organic option you can use One Degree Sprouted Rice Cacao Crisps! Find them on Amazon here. Want your bars to be less chocolatey? Check out the best brands of gluten free Rice Krispy cereal here.
- Sunflower butter. There are quite a few brands available, but the SunButter brand is so smooth and creamy!
- Honey. See below for vegan substitution ideas.
- Protein powder. Choose the brand & flavor of your choice! We used Orgain Strawberries & Cream. Looking for a good protein powder? I review all of my favorite protein brands in this post by taste and cost!
- Chocolate chips. I used Nestle's Toll House allergen-free semi-sweet morsels. You can find them here. There are so many good allergy-friendly varieties. Check out my favorite chocolate chip brands in this post.
Shop Gluten Free Products in this Post
Ingredient Substitutions for Vegan Protein Bars
To make these peanut free protein bars vegan, you'll need to swap out the honey.
Here are some great ideas for swaps (using equal measurements to the honey):
- Maple Syrup
- Date Honey
- Agave
Additionally, you’ll need to double check the other ingredients (such as the protein powder and chocolate chips) to ensure that you are using vegan options!
How to make Nut Free No Bake Protein Bars
These bars could not be easier!
To prep, line your baking pan with parchment and set aside.
Then simply add all the cocoa rice cereal, sunflower seed butter, honey, and protein powder into a medium mixing bowl and mix until well combined. Then add ½ cup of the chocolate chips (reserving the rest for topping).
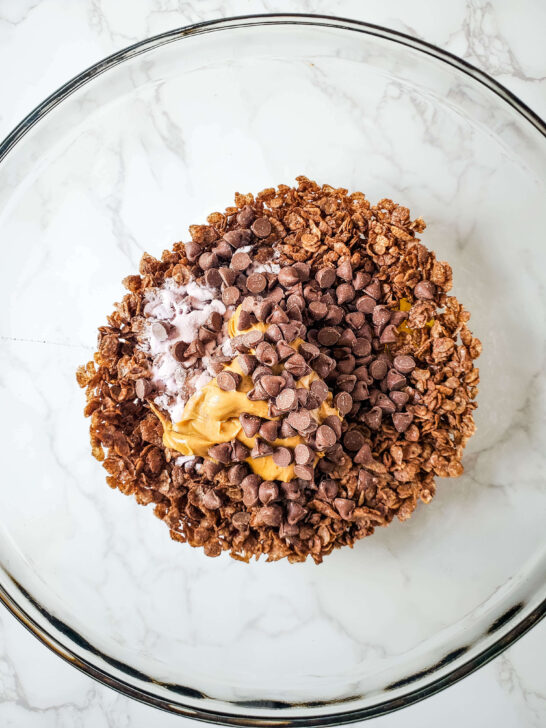
Transfer the entire mixture into the parchment lined baking pan spreading it across evenly. Top with the remaining chips and press down firmly until the mixture is uniform.
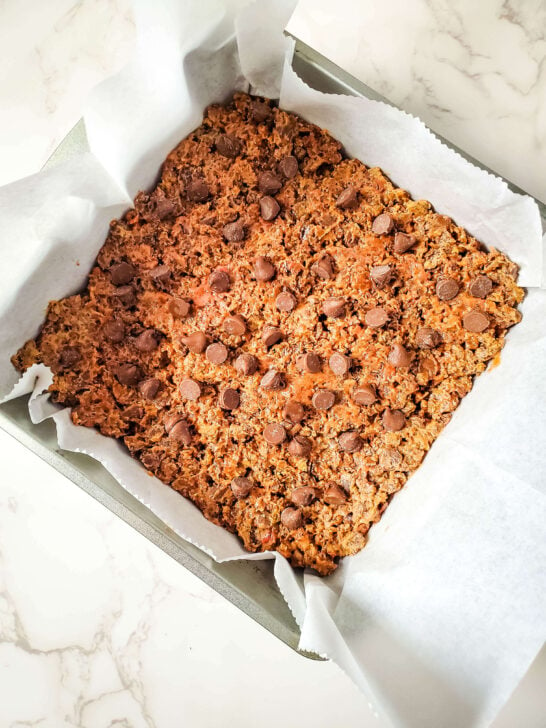
Chill in the fridge for 2 hours until firm. Do not skimp on the chilling time!
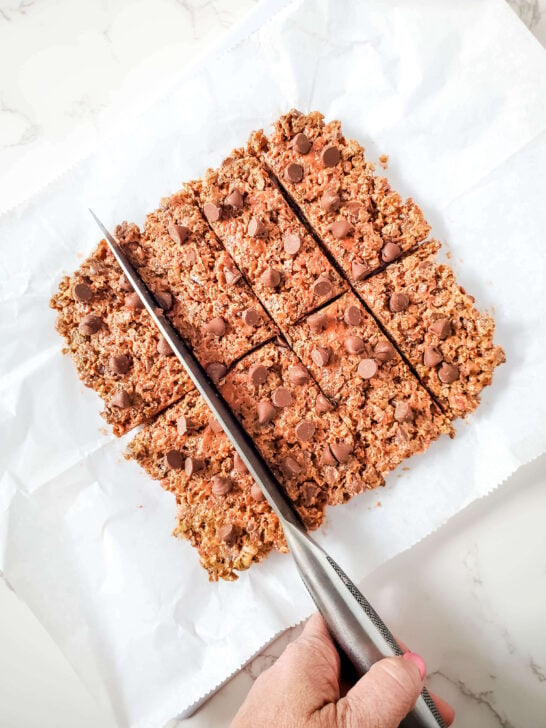
Remove the bars from the fridge, lift using the parchment, and cut into 8 even bars.
How to Store these No Bake Protein Bars
For those looking to make some homemade no-bake protein bars, it is important to consider the best way to store them for extended life.
An ideal way to store no bake protein bars is to wrap each bar separately in plastic wrap, wax paper or parchment paper before storing them all together in an airtight container in the freezer. Doing this double-layer of storage will prevent sticking and help maintain flavor and texture.
Additionally, this protein bar recipe will last a few months if stored correctly.
On the day you plan on consuming a bar, move it from the freezer to the refrigerator so that it can thaw out prior to eating--or just throw it into your lunch bag and it will be defrosted by lunch!
With proper techniques and even longer shelf-life, you can enjoy delicious no-bake protein bars any time you like without having to worry about them going bad too quickly!
Try this Recipe for No-Oat Gluten Free Granola Bars Today!
By following this easy Homemade Double Chocolate Nut-Free Protein Bar Recipe, anyone can make a healthy and delicious snack that is gluten free, dairy free, and full of protein. Perfect for those with dietary restrictions, the natural sweetness of the cocoa and honey makes this a satisfying treat for all.
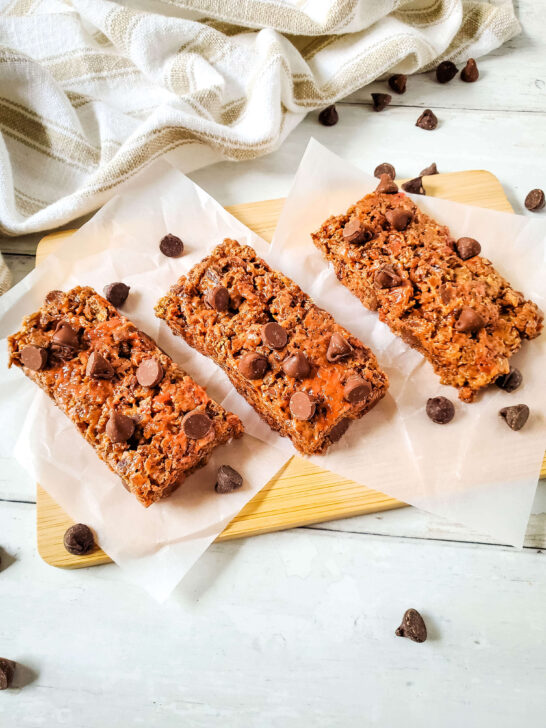
The crunch of the rice cereal gives it a texture not found in other protein bars. It's an enjoyable and convenient way to fuel your body and satisfy your sweet tooth. So, why not make your own protein bars and experience their great taste and health benefits?
Give it a try and see for yourself!
Did you love this nut free energy bar recipe?
If so, be sure to rate the recipe below and share this to your gluten free snacks board on Pinterest!
Scroll down for the printable recipe for peanut free breakfast bars
What's they key to loving your gluten free life? Get your personalized plan with the guide you need to thrive!

Chocolate Nut-Free Protein Bar Recipe (Gluten Free & Dairy Free)
Equipment
- 1 Measuring cups and spoons set
- 1 medium mixing bowl
- 1 spatula
- parchment paper
- 1 8x8 baking pan
Ingredients
- 3 cups gluten free cocoa rice cereal
- ⅓ cup sunflower seed butter
- ¼ cup honey see post for vegan subs
- 1 scoop protein powder
- ¾ cup chocolate chips divided
Instructions
- Line an 8 x 8-inch baking pan with parchment paper and set aside.
- Add all of the ingredients and ½ cup of the chocolate chips to a medium mixing bowl, and mix together.
- Transfer the mixture to the lined baking pan, and spread it out across the pan. Sprinkle the remaining chocolate chips on top of the mixture and press down firmly.
- Refrigerate for 2 hours to allow the bars to set and get firm.
- Remove from the refrigerator, and lift the parchment up and set on cutting board. Cut into 8 bars.
Notes
- ingredient and equipment suggestions & substitutions,
- troubleshooting tips, and
- frequently asked questions
Looking for some other delicious gluten free recipes?
Then check out these:
- The Best Easy No-Bake Gluten Free Treats
- Peanut Butter No Bake Protein Bars
- Banana Pancake Dippers
- Gluten Free Foods Kids Love


Barb
I'm so glad I made this recipe instead of trying to find a store bought option. That search is endless and never has the combination of quality ingredients and macros I'm looking for. Not only are these perfect in that regard, they taste delicious too!
Madison
Made this for a meal prep breakfast this week. I'm vegan so I use maple syrup instead of honey. Turned out great- chewy, soft, perfect level of sweetness. thanks!
Sharon McCaskill
I love this idea! so happy it held together well with maple syrup!
Rosie
I tried making this chocolate-nut-free protein bar, and I love how it turned out! It was so delicious and guilt-free! So, for sure, I will be making this again!
Anna
LOVE THESE! I make a batch at the beginning of the week (I prefer almond butter, and it works!) and grab one on my way out the door. They're perfect to calm hunger in between meals. Try adding some chopped nuts for even more texture - so good!
Sharon McCaskill
LOVE the modifications you made. great ideas!
Jo
These were incredibly delicious. I had a hard time not eating more than one a day (they were meal prepped for my lunches). I do plan on making more with different flavors of cereal. Thank you for a great recipe!
Sharon McCaskill
happy you enjoyed it!